How to Move a Pool Table: The Right Way to Protect Your Investment

How to Move a Pool Table: The Right Way to Protect Your Investment

Moving a pool table requires expertise and careful handling to prevent damage to this substantial investment. Many homeowners choose to work with a dependable moving company rather than risk damage to their valuable billiards table during a DIY move. Whether relocating across town or to another state, properly transporting a pool table involves more than simply lifting and carrying—it requires methodical disassembly, meticulous protection of components, and precise reassembly. Pool tables typically weigh between 700 and 1,000 pounds, with the slate alone accounting for much of this weight. Their size, heavy components, and precise construction make it particularly challenging for them to relocate without proper knowledge and equipment. This comprehensive guide outlines the essential steps to ensure your pool table arrives at its new location in perfect playing condition.

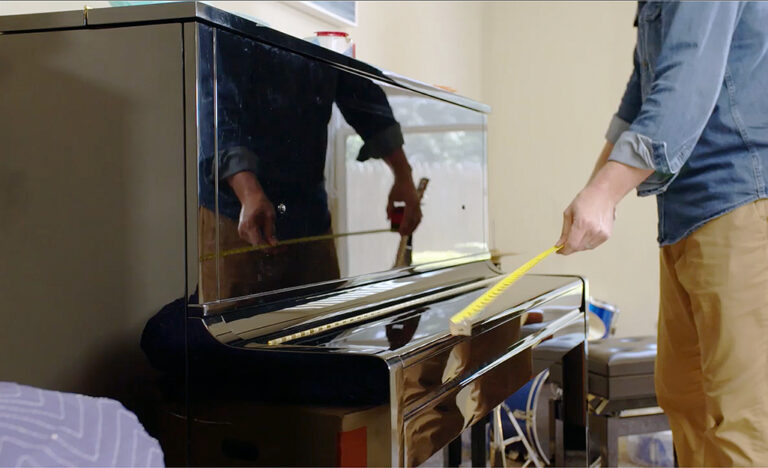
Assessing the Moving Route

Before relocating a pool table, carefully evaluate the route it will be transported to ensure a smooth and successful relocation process. Begin by measuring all doorways, hallways, and staircases to ensure the pool table fits through without issues. Take note of tight corners, low ceilings, or narrow passageways that may present a challenge during the move. Clear the path of any obstacles such as furniture, rugs, or decorations that could hinder the transportation of the pool table. Consider the weight and dimensions of the pool table to determine if specialized equipment or additional help will be necessary. By thoroughly assessing the moving route beforehand, you can anticipate and address potential obstacles, ensuring a seamless relocation process.

Disassembling the Pool Table

To disassemble the pool table efficiently, remove the pockets, rails, and felt covering carefully. Begin by unscrewing the pockets from the table, making sure to keep all screws and parts organized for reassembly. Next, detach the rails by loosening the bolts or screws securing them to the table frame. Take extra care when handling the felt covering; gently peel it off the slate surface to prevent tearing. Once these components are removed, carefully label and store them to avoid misplacement. Keep track of any additional parts or hardware that must be removed, ensuring a smooth reassembly process. Following these steps meticulously will help preserve the integrity of your pool table during the moving process.

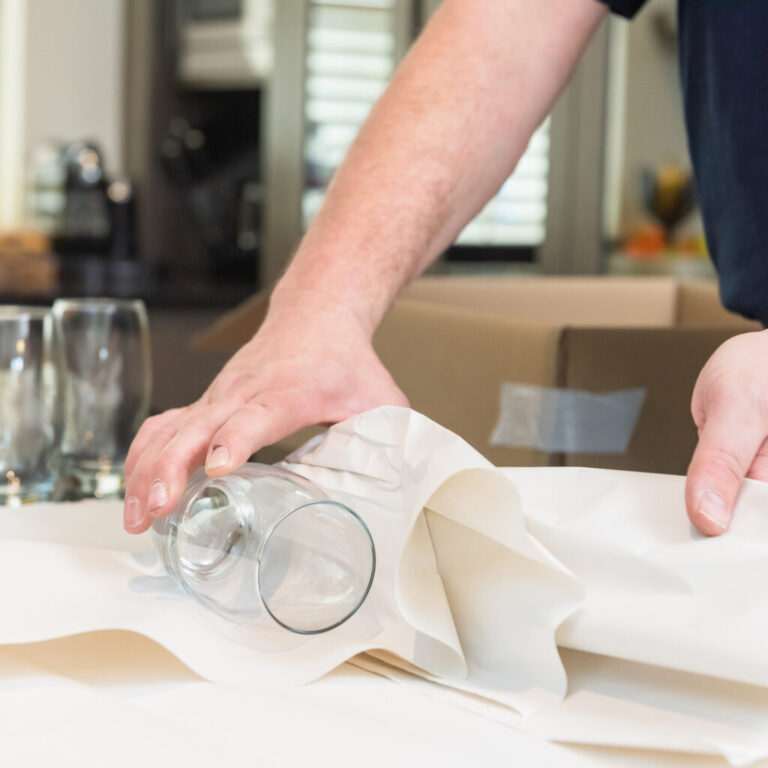
Securing and Protecting Parts

Secure and protect the disassembled parts of your pool table by wrapping each component individually in bubble wrap or moving blankets. Start by carefully wrapping the rails, ensuring the wood is completely covered and secure. Next, focus on the slate pieces, the table’s heaviest and most delicate parts. Use thick moving blankets to protect the slate from any potential damage during transport. For the legs, wrap each one separately to prevent scratches or dents. Moreover, secure any hardware or small parts in labeled bags to avoid losing them. You ensure a smooth and damage-free moving process by taking these meticulous steps to safeguard each part of your pool table.

Safely Transporting the Pool Table

Wrap the disassembled parts securely in bubble wrap or moving blankets to prepare for safe transportation of your pool table. When loading the components into the moving vehicle, ensure they are placed snugly to prevent shifting during transit. Use straps or ropes to secure the parts, minimizing any potential movement that could cause damage. Be mindful of sharp edges or protruding pieces that could scratch or dent the surfaces. In addition, consider laying down protective padding on the vehicle floor to cushion the parts further. Drive cautiously, avoiding sudden stops or sharp turns that could jostle the pieces. By taking these precautions, you safeguard your pool table components and guarantee a smooth transport to your new location.

Reassembling and Leveling the Table

Begin by carefully aligning the slate pieces on the frame, guaranteeing a seamless fit before progressing to reassembling and leveling your pool table. Once the slate is in place, meticulously adjust the leveling screws underneath the table. Use a high-quality bubble level to confirm the surface is perfectly flat. Make small, precise turns on the screws, checking the level frequently until you achieve an even playing field. Take time during this process, as precision is paramount for a professional playing experience. After leveling, secure the frame tightly and double-check the alignment of the slate. A well-leveled table not only enhances gameplay but also prolongs the lifespan of your investment.


Related Articles:

How to Pack Dishes for Moving: Keep Your Dinnerware Intact

How to Pack Dishes for Moving: Keep Your Dinnerware Intact

Relocating your kitchen items requires special attention, particularly fragile dinnerware that can easily break during transit. Whether handling the packing yourself or working with a comprehensive moving company that offers full-service options, understanding the proper techniques for securing your plates, glasses, and bowls can prevent costly and disappointing damage. Proper dish packing involves more than simply wrapping items in newspaper and hoping for the best—it requires strategic planning, quality materials, and methodical execution. This guide walks you through the essential steps to ensure your valuable dinnerware, from everyday plates to precious heirloom china, arrives safely at your new home without chips, cracks, or breaks.

Gather Packing Supplies

What do you need to gather to pack your dishes to move efficiently? Having the right packing supplies is the key to keeping your dinnerware safe during the move. To start, you will need sturdy cardboard boxes in various sizes to accommodate different types of dishes. Bubble wrap, packing paper, and foam pouches are essential for cushioning and protection. Make sure to have packing tape to secure the boxes and prevent them from opening during transportation. Moreover, markers for labeling the boxes will help you identify the contents easily when unpacking. Gathering these packing supplies beforehand guarantees that your dishes are well-protected and organized for the move.

Sort and Organize Dishes

To pack your dishes efficiently for moving, start by sorting and organizing them according to their size, shape, and fragility. Here’s how to effectively categorize your dinnerware:

  1. Group by Size: Arrange dishes from largest to smallest to make packing and stacking them easier.
  2. Categorize by Shape: Separate plates, bowls, cups, and glassware to prevent them from rubbing against each other during the move.
  3. Consider Fragility: Identify delicate items such as fine china or crystal, and set them aside for extra care and protection.

Use Protective Wrapping

Begin by wrapping each dish with a layer of protective material, such as bubble wrap or packing paper, to safeguard them during moving. Place the dish in the center of the protective material, then fold the corners over the dish and secure them with tape to guarantee a snug fit. For plates, stack them together with a layer of protective material in between each one. Use dish dividers or cardboard between plates to prevent them from shifting and causing damage. Bowls and cups should be wrapped individually and placed upside down in boxes to minimize the risk of breakage. Remember to label boxes as fragile to alert movers to handle them cautiously.

Pack Dishes Strategically

For efficient packing, strategically organize your dishes in boxes based on size and fragility to guarantee they arrive intact at your new destination. Here’s how you can pack your dishes strategically:

  1. Largest at the Bottom: Place larger and sturdier items at the bottom of the box to provide a solid base.
  2. Separate with Packing Material: Use bubble wrap or packing paper to cushion and separate dishes, preventing them from knocking against each other.
  3. Top with Lighter Items: Place lighter and more delicate dishes on top, ensuring they don’t get crushed under heavier items during transportation.

Label Boxes Clearly

Ensure that each box containing packed dishes is clearly labeled with its contents to streamline the unpacking process at your new location. Labeling boxes helps you identify what is inside each box and enables movers to handle them with care. Use a permanent marker to write the box contents on the top and at least two sides. Moreover, consider color-coding your labels for different rooms to make sorting easier. Be specific in your labeling; instead of writing ‘kitchen stuff,’ list items like ‘plates,’ ‘glasses,’ or ‘silverware.’ This level of detail will save you time and effort when unpacking, ensuring your dishes arrive safely and are easily accessible.


Related Articles:

How to Move a Refrigerator: What You Need to Know Before You Start

How to Move a Refrigerator: What You Need to Know Before You Start

Relocating large appliances requires careful planning and proper techniques to avoid damage to the item and your property. Working with a dependable moving team can ease this burden, but understanding the process remains essential whether handling the move yourself or supervising professionals. Refrigerators present unique challenges due to their size, weight, and internal mechanisms that can be damaged if not adequately prepared for transport. From ensuring adequate clearance through doorways to properly securing internal components and defrosting the unit, each step plays a crucial role in a successful move. This comprehensive guide outlines the five essential considerations when relocating a refrigerator, helping you avoid common pitfalls and ensuring your appliance arrives safely at its new location.

Measuring Doorways and Pathways

How do you ensure your refrigerator will fit through doorways and pathways? Start by measuring the dimensions carefully to avoid any potential obstacles during the move. First, measure the width, height, and depth of your refrigerator. Write down these measurements so you can easily reference them later. Next, measure the narrowest points of your doorways, hallways, and any turns the refrigerator will need to make during the move. Compare these measurements to those of your refrigerator. Remember to account for any protruding handles or hinges that may add to the overall width. By taking precise measurements beforehand, you can guarantee a smooth and hassle-free moving process for your refrigerator.

Securing Loose Items Inside

To prevent any shifting or damage during the move, securely fasten loose items inside your refrigerator using strong adhesive tape or straps, and remove all loose shelves, drawers, and bins from the fridge. Take out any food items and store them separately. Secure the shelves by taping them to the interior walls of the refrigerator. Use adjustable straps to hold larger items like drawers in place. Make sure the doors are securely closed by securing them with tape or a cord. This step is pivotal to prevent any internal damage to the refrigerator components during transportation. Once all loose items are secured, your refrigerator will be better prepared for a safe and smooth move.

Emptying and Defrosting the Fridge

Before moving your refrigerator, it is important to empty and defrost it to guarantee a successful and hassle-free relocation. Start by removing all items from the fridge, including food, shelves, drawers, and any loose items. Dispose of perishable items and pack non-perishables separately. Please switch off the refrigerator and unplug it from the power source. Allow the fridge to defrost naturally by leaving the doors open. Place towels around the base of the refrigerator to catch any water that may drip during defrosting. Once all the ice has melted, clean the interior thoroughly with a mild detergent and dry it completely. Defrosting may take several hours, so plan accordingly before moving the refrigerator.

Gathering Necessary Supplies

Before moving your refrigerator, gather the necessary supplies for a smooth and efficient process. You will need a dolly or hand truck to transport the fridge easily. Make sure to have moving straps or a strong rope to secure the fridge on the dolly. Have a measuring tape to confirm the refrigerator will fit through doorways and hallways. Get some furniture sliders to help move the fridge across floors without causing damage. Have cleaning supplies ready to clean the area where the refrigerator will be placed in the new location. Moreover, packing materials like blankets or bubble wrap should be kept to protect the fridge during the move.

Enlisting Help or Hiring Professionals

Consider enlisting the help of family or friends or hiring professional movers to assist in safely moving your refrigerator to its new location. When choosing between the two options, consider the weight and size of your refrigerator. Professional movers may be the best choice if it’s a larger model or located on a different floor due to their experience and equipment. However, if you decide to go with friends or family, make sure they are physically capable of lifting heavy objects and have clear instructions on how to handle the refrigerator safely. Communicate the plan beforehand, assign roles, and ensure everyone understands the precautions to avoid injuries or damages during the move.


Related Articles:

What to Pack First When Moving: Essential Items You Can’t Forget

What to Pack First When Moving: Essential Items You Can't Forget

Moving to a new home involves numerous challenges, and packing efficiently ranks among the most critical tasks. Working with a reliable moving crew can ease the physical burden of transportation, but knowing which items to pack first—and which to keep readily accessible—remains your responsibility. Proper preparation prevents the frustration of arriving at your new home only to discover essential items buried in unmarked boxes or left behind altogether. Creating a strategic packing plan that prioritizes crucial items streamlines the moving process and ensures a smoother transition during those first few days in your new space. This comprehensive guide outlines the five essential items you should pack first, yet keep easily accessible, when preparing for your upcoming move.

Important Documents

Gather all your essential papers before relocating to guarantee a smooth switch to your new home. Collect identification papers like your driver’s license, passport, and birth certificate. Include any relevant financial documents such as bank statements, insurance policies, and tax records. Don’t forget to pack medical records, especially if you have ongoing treatments or conditions. It’s critical to have copies of your lease or mortgage agreements and any legal documents like wills or power of attorney forms. Organize these papers in a secure folder or binder to keep them safe during the move. Preparing these important documents will ensure a stress-free switch to your new residence.

Medications and First Aid

Ensure you have all necessary medications and first aid supplies readily accessible during your move to promptly address any unexpected health needs. Prepare a small kit with bandages, antiseptic wipes, pain relievers, and any prescription medications you or your family may need. Keep this kit in an easily accessible place, separate from your other packed items. Confirm medications are in their original packaging with clear labels to avoid confusion. It’s also wise to have a handy list of emergency contacts, including doctors and pharmacies. By prioritizing your medications and first aid supplies, you can handle any health-related situations that may arise smoothly and efficiently during the moving process.

Toiletries and Personal Care

Safeguard your toiletries and personal care items by packing them securely and making them easily accessible for your move to maintain your daily hygiene routine without interruption. Gather essentials like toothbrushes, toothpaste, shampoo, conditioner, soap, and any skincare products you use daily. Place them in a clear, sealable bag to prevent leaks. Remember to pack any medications or special skincare items separately for easy access. Consider including a small first aid kit with bandages, antiseptic wipes, and pain relievers. Keep these items in a designated box or bag that you can easily find upon arrival at your new place. Having your toiletries and personal care items readily available will guarantee you can start your new chapter feeling clean and refreshed.

Change of Clothes

Make sure your change of clothes are packed in a separate bag for easy access during your move. Having a set of clothes readily available can be a lifesaver amidst the chaos of relocating. Include a few days’ worth of outfits, comfortable shoes, and weather-appropriate attire. Opt for versatile pieces that can be mixed and matched to suit different occasions. Remember to pack undergarments, socks, and accessories as well. Consider the climate of your new location and pack accordingly. Roll your clothes to save space and prevent wrinkles. Label the bag clearly so you can easily identify it when needed. Organizing your change of clothes this way will make you feel prepared and comfortable throughout the moving process.

Bedding and Linens

When preparing for your move, ensuring you have bedding and linens readily available is crucial for a smooth shift into your new living space. Pack essential items like sheets, pillowcases, blankets, and towels. Consider the climate of your new area to pack accordingly – whether you need lightweight sheets for warm weather or extra blankets for colder nights. Vacuum-seal bags can help save space and keep linens fresh during the move. Label your bedding boxes clearly for easy access upon arrival. Having your bedding and linens unpacked and ready will provide comfort and a sense of home in your new surroundings, making the shift much more pleasant and relaxing.


Related Articles:

How to Pack Shoes for Moving: Keep Them Safe and Organized

How to Pack Shoes for Moving: Keep Them Safe and Organized

Moving your shoe collection requires careful planning and proper packing techniques to prevent damage during transit. Working with trusted movers in Burnaby can help with the heavy lifting, but knowing how to prepare your footwear beforehand ensures they arrive in perfect condition at your new home. Each pair deserves proper protection to maintain its shape and appearance, from expensive dress shoes and designer heels to everyday sneakers and boots. The packing process doesn’t need to be complicated – with the right materials and techniques, you can efficiently organize your shoes while maximizing space in your moving boxes. This comprehensive guide covers everything from selecting appropriate packing supplies and preparing shoes to space-saving strategies and special considerations for delicate footwear.

Choose the Right Packing Materials

When packing shoes for moving, ensure you have the right materials to protect them during transit. Gather sturdy cardboard boxes in various sizes, ensuring they are clean and in good condition. Wrap each shoe individually in packing paper to prevent scuffing and damage. Stuff the toes of your shoes with tissue paper or bubble wrap to help them maintain their shape. Consider using shoe bags or boxes for delicate or special shoes to provide extra protection. Fill empty spaces in the boxes with packing material to prevent shifting during transportation. Seal the boxes securely with packing tape and label them clearly with the contents and destination room to stay organized during unpacking.

Clean and Prep Your Shoes

To ensure your shoes are ready for packing, start by cleaning and prepping them before placing them in the boxes for moving. Begin by wiping your boots with a damp cloth to remove dirt, dust, or grime. For leather shoes, use a leather cleaner and conditioner to keep them supple and moisturized during the move. Allow your boots to air dry thoroughly before packing them to prevent mold or mildew growth. Stuff your shoes with tissue paper or sock balls to help them maintain their shape and absorb any excess moisture. Finally, secure any loose laces or buckles to prevent tangling or damage during transit. Following these steps will ensure your shoes stay in top condition during moving.

Optimize Space in Boxes

Maximize the storage capacity in your moving boxes by strategically arranging and organizing your shoes to optimize space efficiency. Start by placing smaller shoes like flats and sandals inside larger footwear, such as boots or sneakers, to fill any gaps. Stuff socks or small accessories inside the shoes to make the most available space. Consider packing them separately for high heels or delicate shoes to prevent damage. Utilize every inch of the box by stacking shoes heel to toe or sole to sole. Fill any remaining gaps with soft items like scarves or socks to keep the shoes in place and prevent shifting during transit. By maximizing space in your moving boxes, you can efficiently pack and protect your shoe collection.

Protect Delicate Shoes

To safeguard delicate shoes while relocating, envelop each shoe individually in tissue paper or bubble wrap before placing them in a sturdy shoe box. This guarantees that your shoes stay safe and secure during the transfer. Here are some tips to help you protect your delicate footwear:

  1. Utilize tissue paper: Wrap each shoe gently in tissue paper to protect against scratches or scuffs.
  2. Bubble wrap: For extra delicate shoes, consider wrapping them in bubble wrap to absorb any impact during the move.
  3. Fill empty spaces: Use crumpled tissue paper or socks to fill gaps in the shoe box, preventing the shoes from shifting during transportation.

Keep Pairs Together

Keep pairs together when packing your shoes to avoid any mix-ups during the relocation process. To achieve this, gather all your shoes and match them into pairs. One effective method is using rubber bands or zip ties to secure each pair. Alternatively, you can place one shoe inside the other, ensuring they remain a set. Keeping pairs together helps you stay organized and makes unpacking at your new destination much simpler. Remember to clearly label the containers or boxes to indicate which pairs are inside. By taking this simple step, you can guarantee that your shoes arrive safely and remain organized throughout the moving journey.


Related Articles:

Where to Get Moving Boxes

Where to Get Moving Boxes

As we prepare for relocation, finding suitable containers becomes a crucial part of the process. The search for quality moving boxes can take us in many directions—from neighborhood shops to online retailers and community resources. Having a dedicated moving team can significantly ease this process, as professional movers often provide specialized boxes designed for specific items. However, if you’re handling the packing yourself, knowing where to source sturdy, affordable boxes becomes essential. This guide explores various options to help you gather the containers you’ll need without breaking your budget.

Local Retail Stores

Local retail stores offer a convenient option for acquiring moving boxes. These establishments stock various box sizes suitable for different packing needs. Many receive frequent shipments, ensuring a steady supply of containers. The quality of boxes from retail stores tends to be robust, which is critical for protecting belongings during transportation. Prices may vary between stores, but they typically provide reasonable rates compared to specialty moving supply retailers. Calling ahead to check box availability and sizes can save time before visiting. Overall, neighborhood retail stores provide a reliable and efficient source for gathering moving supplies during your relocation process.

Online Marketplaces

Online marketplaces provide a convenient and efficient option for sourcing moving boxes. These platforms offer extensive selections at competitive prices, making it easier to find containers that match your specific requirements. Here are some benefits of using online marketplaces:

  • Convenience: Purchase moving boxes without leaving home.
  • Variety: Select from different sizes, shapes, and materials to address your specific moving needs.
  • Comparisons: Easily compare prices and read customer reviews to make informed decisions.

These digital platforms deliver a straightforward way to purchase moving supplies while balancing quality and cost considerations.

Recycling Centers

Local recycling centers offer a sustainable and economical way to acquire moving boxes. These facilities regularly receive cardboard boxes from commercial shipments and deliveries, making them excellent resources for finding sturdy packing materials. By visiting recycling centers, you can obtain free moving boxes while helping reduce waste by giving these containers a second use. Call ahead to ask about availability, as centers might have specific collection times or limits on how many boxes you can take. Always inspect containers for damage or weakness to ensure they’ll adequately protect your belongings during transit.

Friends and Family

Reaching out to friends and family for moving boxes can be highly beneficial as they may have extras from their recent moves or purchases. Personal connections often willingly help with relocations by providing used boxes still in good condition. The advantages include:

  • No cost, allowing you to allocate funds to other moving expenses.
  • Environmental benefits from reusing existing boxes rather than purchasing new ones.
  • Social connection while gathering supplies for your move.

Moving Companies

Moving companies offer another reliable source for quality moving boxes. Many professional movers sell boxes or include them as part of their service packages. These containers are typically durable and specifically designed to withstand transportation challenges. Obtaining boxes from moving companies ensures you’re using appropriate materials for safely transporting your possessions. Some companies also provide eco-conscious alternatives, such as reusable plastic bins, offering a sustainable option for your relocation. Contact local movers to inquire about box options, pricing, and additional packing services they might offer to assist with your move.


Related Articles:

How to Move a Piano

How to Move a Piano

When it comes to moving a piano, there are essential steps to consider that can make the process smoother and safer. Many homeowners underestimate the complexity involved and risk damaging both their instrument and property by not seeking comprehensive moving services from professionals who understand these unique challenges. From securing loose parts to using the right equipment, every detail matters when relocating these heavy, delicate instruments. Navigating tight spaces and tricky corners requires specific techniques and proper preparation. This guide outlines key strategies for successfully relocating a piano without risking damage to this valuable investment.

Preparing the Piano

Before moving a piano, we always carefully prepare it by securing the keys, pedals, and any loose parts to prevent damage during transportation. Securing the keys involves closing and locking the fallboard, which is the part that covers the keys. This step ensures that the keys remain stationary and protected. Next, we secure the pedals by wrapping them with a soft cloth or padding and then using tape to hold the padding in place. Any loose parts, such as music stands or decorative elements, are removed and securely stored to prevent them from shifting or causing damage. Taking the time to properly prepare the piano is vital for ensuring a smooth and damage-free moving process.

Gathering the Right Equipment

To move a piano efficiently and safely, you must gather appropriate equipment for the task. Key items include heavy-duty gloves to protect your hands, furniture straps or moving straps to aid with lifting, a furniture dolly for easier transportation, moving blankets or pads to prevent scratches, and strong securing ropes or straps to keep the piano stable during transit. Having a toolbox with basic tools like screwdrivers and pliers can be useful for any last-minute adjustments. Check that all equipment is in good condition and properly functioning before starting the moving process. Having the right tools on hand reduces the risks and challenges associated with moving a piano.

Securing and Lifting the Piano

To safely secure and lift a piano, position the furniture straps securely underneath the instrument, ensuring a strong and stable grip before attempting to lift. Once the straps are in place, confirm they are tightened securely to avoid slippage during the lifting process. When preparing to lift, make sure to have a clear path and good communication with your lifting partner to avoid accidents. Remember, pianos are heavy and delicate instruments that require careful handling to prevent damage.

  • Position the furniture straps securely: Confirm they are snug and won’t slip.
  • Tighten the straps carefully: Prevent any chance of the piano shifting.
  • Communicate with your lifting partner: Coordination is key to a successful lift.

Maneuvering Through Doorways and Stairs

After securing and lifting the piano successfully, navigate the challenge of maneuvering it through doorways and stairs with caution and precision. When moving through doorways, ensure the path is clear of obstacles and measure the doorway’s width to determine if the piano can fit through. Tilt the piano slightly to angle it through the doorway, taking care not to damage the walls or the piano itself. When tackling stairs, use a sturdy dolly and have one person stabilize the piano from the top while others carefully guide it down step by step. Always move slowly and communicate effectively to avoid accidents. Patience and teamwork are essential when maneuvering a piano through tight spaces.

Setting up the Piano in Its New Location

Guiding the piano to its assigned location, carefully position it for optimal acoustics and aesthetics in its new residence. Proper setup is essential for both sound quality and overall appearance. Consider these key steps:

  • Floor Placement: Position the piano away from direct sunlight and drafts to prevent damage.
  • Tuning: Allow the piano to adjust to the new surroundings before tuning to maintain pitch stability.
  • Regulation: Check the piano’s regulation, including the touch and responsiveness of the keys, to ensure optimal playability.


Related Articles:

How to Pack China for Moving

How to Pack China for Moving

Moving fragile items like china requires careful planning and proper techniques to prevent damage. Many people underestimate the importance of correctly packing these delicate pieces, which often leads to heartbreaking losses during transit. Partnering with dependable movers can significantly reduce this risk, as they bring specialized knowledge and materials to the table. However, regardless of whether you hire professionals or tackle the job yourself, understanding the best practices for packing china will ensure your precious items arrive safely at your new home. Let’s explore expert strategies that will protect your valuable dinnerware throughout the moving process.

Choosing the Right Packing Materials

When preparing to pack fragile items like china for a move, selecting appropriate packing materials is crucial for safe transport. Success depends on using materials that provide sufficient cushioning and protection. Bubble wrap works excellently for wrapping individual pieces, shielding them from impact. Packing paper or foam sheets can separate stacked items and prevent scratches. For added security, specialty dish boxes offer enhanced protection and help keep items organized during transit. Remember, the quality of your packing materials directly affects your china collection’s safety, so choose wisely to protect these delicate pieces throughout the moving process.

Wrapping Each Piece Carefully

The safe transport of delicate china requires careful wrapping of each item with proper cushioning materials like bubble wrap or foam sheets. Start with a clean, flat work surface. Place bubble wrap or foam sheeting down and gently position your china piece on top. Completely wrap the item, ensuring all sides have coverage, and secure with tape. For pieces with delicate handles or spouts, add extra padding to these vulnerable areas. Wrap each piece individually to prevent damage during transit. The goal is providing enough cushioning to absorb any impact. Taking time to meticulously wrap each piece helps ensure they arrive at your new home intact.

Organizing Boxes for Transport

For safely transporting china during a move, proper box organization is essential. Place heavier items at the bottom of the box and lighter, more fragile pieces on top to prevent breakage during transport. Wrap each piece in packing paper or bubble wrap before placing them in the box for extra protection. Fill empty spaces with packing peanuts or crumpled paper to prevent shifting during the move. Clearly label boxes with “fragile” stickers to alert movers to handle them with special care. These organizational strategies help ensure a smooth and successful move for your valuable china collection.

Securing Boxes for Safe Moving

To protect your china during the move, properly securing the boxes is critical. Start by padding the bottom of each box with crumpled paper or bubble wrap. Wrap individual pieces in packing paper or bubble wrap, then arrange them snugly in the box, filling gaps with additional cushioning material. Layer the heaviest items at the bottom and lighter ones on top to prevent crushing. Seal boxes with high-quality packing tape, reinforcing the bottom and edges for added strength. Label each box as “fragile” and indicate which way is up. These precautions safeguard your precious china collection throughout the entire moving process.

Unpacking and Inspecting Upon Arrival

After reaching your new home, carefully unpack and inspect your china to verify it has arrived safely and intact. Follow these steps for best results:

  1. Unpack Methodically: Handle one box at a time to avoid overwhelming yourself and potentially damaging fragile items.
  2. Inspect for Damage: Examine each piece of china thoroughly for any signs of damage such as cracks, chips, or scratches.
  3. Document Any Issues: Record any damages and take photos as evidence for potential insurance claims.
  4. Proper Storage: Once inspected, store your china safely away from high traffic areas to prevent accidental breakage.

Following these steps ensures your treasured china remains in excellent condition after your move.


Related Articles:

How to Pack Wine Glasses for Moving

How to Pack Wine Glasses for Moving

When preparing for a move, protecting delicate items requires special attention. Wine glasses, with their fragile stems and delicate bowls, present a particular challenge that can cause significant stress for homeowners. Finding a reliable moving team in Burnaby can help ease this burden, but knowing how to properly pack these items yourself is invaluable. This guide outlines essential techniques for safely transporting your wine glasses, from selecting appropriate materials to positioning them correctly in boxes, ensuring they arrive at your new home intact.

Choose the Right Packing Materials

Selecting appropriate packing materials is crucial when preparing wine glasses for transport. The success of your move largely depends on using proper supplies. Look for sturdy boxes specifically designed for glassware—these contain compartments creating individual slots for each glass, preventing contact between items. Bubble wrap serves as essential cushioning material; wrap each glass separately with multiple layers to absorb potential impacts during transit. Packing paper works well for filling empty spaces within boxes, keeping glasses secure in their positions. By investing in quality packing materials, you significantly reduce the risk of damage to your wine glasses during the moving process.

Wrap Each Glass Carefully

Protecting wine glasses during a move requires wrapping each piece individually with multiple layers of bubble wrap. This careful process shields delicate stems and bowls from potential damage. Follow these steps for effective glass wrapping:

  • Start with Clean Glasses: Ensure all glasses are washed and completely dry before wrapping.
  • Wrap the Stem First: Begin by covering the stem with bubble wrap, as this is the most fragile part.
  • Cover the Bowl Securely: Wrap the bowl thoroughly, making sure it’s completely protected.
  • Secure with Tape: Use clear packing tape to hold the bubble wrap in place for added support.

Pack Glasses in Sturdy Boxes

Place wrapped wine glasses in sturdy boxes for maximum protection during your move. Strong, quality boxes provide a stable environment for fragile glassware throughout transportation. Select containers specifically designed for glassware when possible, as these feature dividers that keep glasses separated and prevent them from colliding. Verify that boxes are clean and structurally sound to avoid unexpected breakage. Reinforce the bottom and sides with additional tape for enhanced durability. Pack heavier glasses at the bottom and lighter ones toward the top to properly distribute weight within the box.

Label Boxes Fragile

Clearly marking boxes as fragile ensures proper handling of your glassware during the moving process. This simple step alerts movers that these containers require extra care. When labeling, use large, bold lettering that’s easily visible from a distance. Consider these important practices when marking fragile boxes:

  • Apply red ‘Fragile’ stickers or tape for maximum visibility.
  • Mark which side should face upward to prevent improper handling.
  • Include additional warnings like ‘Handle with Care’ or ‘Glassware Inside.’
  • Place labels on multiple sides of each box for better awareness.

Secure Boxes in Transit

Properly securing wine glass boxes during transport prevents breakage and protects your valuable items. Begin by using strong cardboard boxes specifically designed for fragile items. Reinforce the box bottom with packing tape for added support and stability. Create a protective base layer using bubble wrap or packing paper before placing individually wrapped glasses inside. After arranging all glasses in the box, fill any empty spaces with additional cushioning material to prevent movement during transport. Complete the packing process by sealing the box thoroughly with tape and marking it clearly as fragile to ensure careful handling by movers.


Related Articles:

How to Pack Records for Moving

How to Pack Records for Moving

Moving a vinyl collection requires special care to prevent damage to these fragile treasures. Many collectors worry about warping, scratching, or sleeve damage during transportation. Working with local movers of Burnaby who understand the delicate nature of vinyl records can provide peace of mind, but knowing how to properly prepare your collection is equally important. This guide offers practical advice for safely packing your records, ensuring they arrive at your new home in the same condition they left—ready to spin on your turntable without missing a beat.

Gather Necessary Packing Materials

Begin by collecting all essential packing materials before starting the moving process. For properly packing records, you’ll need sturdy cardboard boxes in good condition and appropriate sizes. Ensure the boxes fit your records snugly to prevent shifting during transport. Gather plenty of packing paper or bubble wrap to cushion the records and protect them from potential damage. Have packing tape ready to secure the boxes once filled. Preparing these materials beforehand ensures a smooth and organized packing process for your valuable vinyl collection.

Protect Record Covers

Safeguard record covers by wrapping each one in packing paper or bubble wrap before placing them in cardboard boxes. This crucial step prevents damage and wear to the covers during transit, helping them arrive at your new location in excellent condition. Secure the wrapping material with tape to keep it in place. For additional protection, consider using corner protectors or cardboard inserts around the edges of the covers. Taking time to properly protect your record covers preserves the quality and value of your collection for years to come.

Safely Stack Vinyl Records

Stack vinyl records vertically like books to prevent warping or damage during the move. Horizontal stacking puts pressure on records at the bottom, causing them to bend under the weight and potentially warp or crack. Vertical arrangement distributes weight evenly and reduces damage risk. Make sure each record sits securely in its sleeve to prevent movement during transportation. For extra protection when stacking multiple records together, place a piece of cardboard between them. Keep stacks at manageable heights to prevent toppling. Proper stacking techniques ensure your vinyl collection arrives in pristine condition.

Choose Appropriate Moving Boxes

Select durable cardboard boxes in various sizes to accommodate your collection properly. Use small to medium-sized boxes for vinyl records since they become heavy quickly when grouped together. Save larger boxes for lighter items like clothing or bedding. Inspect each box for tears or damage that might compromise your records’ safety during transit. Reinforce box bottoms with extra packing tape for added support. Avoid overfilling boxes, which can lead to breakage or make them too heavy to lift safely. Choosing the right containers plays a vital role in keeping your records secure throughout the moving process.

Label Boxes for Easy Unpacking

Make unpacking more efficient by clearly labeling each box with its contents. Use a permanent marker to write details on both the top and at least one side of each container. Include information such as room destination, specific record genres, and any special handling instructions. Consider implementing a color-coding system for different record categories or rooms to simplify sorting upon arrival. Create a master inventory list that correlates box numbers with detailed contents for easy tracking. Place labels on smooth surfaces where they can be easily read, and ensure they’re securely attached to prevent loss during transport. Well-labeled boxes streamline unpacking and minimize confusion after the move.


Related Articles: